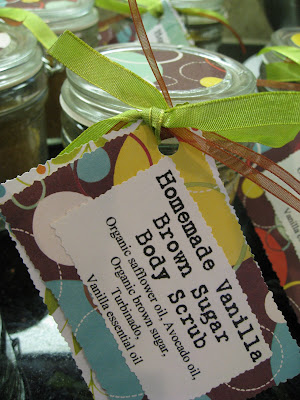
 The inspiration came from some homemade body scrub that Jessie made for me as a birthday gift...which was the best! The project was very easy & something kids can easily get in on!
To begin, choose your jar. I went to Hobby Lobby & found these wide mouthed jars with hinged lids for $1.33 each (I visited when they were 1/2 price, so I got an even better deal!). While you're at the craft store, swing by the scrapbook section and pick a spiffy pattern paper to top your jar with & make your tag with. I used one 12x12 sheet for the lids and another 12x12 sheet for the labels. And don't forget your jar of Glossy Mod Podge & a small foam brush.
Cut circles from the scrapbook paper the size of your jar's lid. I used a cup as my template. Brush a layer of Mod Podge onto the jar's lid, place your paper circle on top, & smooth out any air bubbles. Then brush a layer of Mod Podge on top of the paper, making sure to get your Mod Podge over the paper's edges (this will waterproof the paper). Allow to dry over night.
For your sugar scrub, you'll need:
1 cup organic brown sugar
1/2 cup turbinado sugar (this is very, very coarse so you could use another 1/2 cup brown sugar if you'd like a finer grit scrub)
organic safflower oil
avocado oil
essential oil (I used vanilla)
Combine the brown sugar & turbinado sugar in a bowl and stir to blend. Add just enough of the two oils to the sugar so that it sticks together slightly but isn't overly oily. It's better to start with too little oil, mix your oil/sugar well, & add more oil if needed. At this point, take a little bit to the sink & scrub your hands well. Decide if it's the consistency you like. If not, add more sugar or oil. Last, add enough essential oil to make it smell as strong or subtle as you wish.
Fill your jars (after the lids have dried) with your sugar scrub. My jars held about 1 cup of scrub each. Smooth the top of the sugar scrub with the back of a spoon, & use a small heart shaped cookie cutter to imprint a heart on the top of the sugar.
All that's left is to make your tag! I used the same paper from the lids to make a label, and tied it onto the jar with coordinating ribbon. Wow your friends & family with your crafty gift :)!!


10 comments:
hmmm, it seems like i've made that before... oh wait, i have! :]] haha
Heather, that is SO cute!! Thanks for posting that! I'll be back to look for it next time I need some gifts... maybe Christmas - that would be CUTE!!
It was fabulous! Thanks.
Thats so cute, what a great idea!
Ooooh - love that idea!!!!!
Those are VERY cute!!
Dora Renee' Wilkerson
I love how you decorated your jars!
These are adorable! I'm going to link to your post in my "Green the Season series".
Those are adorable!!!
Thank you for participating in my Christmas Crafts Blog Carnival! Your presentation is sweet - good enough to eat! Carnival link: http://keikigifts.brighterplanet.org/handmade-gift-ideas/carnival-1-christmas-crafts
Post a Comment